Zight Screen Recorder Overview
Zight Screen Recorder for Mac is a menu bar app that captures your screen, webcam, or both, then hands you a shareable link in seconds. Formerly known as CloudApp, it's built for people who'd rather show something than type it out. Beyond raw recording, Zight adds AI transcripts, auto-generated titles, and a built-in editor, so a rough capture becomes a polished clip without leaving the app. The current release, version 8.7.3, runs natively on both Apple Silicon and Intel Macs.
Why Choose Zight Screen Recorder
Most Mac screen recorders either lean too basic, like the built-in QuickTime tool, or too bloated for a quick capture. Zight sits in the middle: a lightweight menu bar app that opens fast, records instantly, and doesn't demand a learning curve before your first useful recording. It's a genuinely universal build too, running native on M-series chips and Intel Macs alike, so there's no Rosetta tax slowing things down on newer hardware.
The bigger differentiator is what happens after you hit stop. Competing Mac tools often stop at "record and save," but Zight auto-uploads to the cloud, generates a shareable link, and lets AI handle titling and transcription while you move on to the next task. For Mac users specifically, recent updates also patched scrolling and full-screen capture quirks that showed up under macOS Tahoe, something worth knowing if you've held off updating your OS out of caution.
Key Features
- One-click full screen, region, webcam-only, or screen-plus-cam recording
- Instant cloud upload with an auto-copied shareable link
- AI-generated titles, summaries, and transcripts in 50+ languages
- Built-in editor for trim, crop, split, merge, and filters
- In-video annotations: arrows, text, shapes, and blur for sensitive info
- Password-protected links with optional auto-destruct timers
- Custom domains for branded sharing links
- Team workspaces with viewer analytics and open-tracking
- Direct integrations with Slack, Trello, Asana, and Jira
- Request Video links that let anyone record and reply without installing anything
What's New in 8.7.3 Version
Version 8.7.3 focuses on reliability and a few workflow additions rather than a visual overhaul.
- Request Video: share a link that lets recipients record and reply straight from their browser, no install needed
- A meeting-start prompt that nudges you to begin a Zight recording the moment a call starts
- Simpler onboarding for security certificates and permission prompts
- Fixed scrolling and full-screen capture issues on macOS Tahoe
- Dozens of smaller UI fixes and more reliable handling of upload and permission errors
- Together these changes mean fewer interruptions mid-recording and a smoother first-run setup for new Mac users.
Supported macOS Versions
Zight requires macOS 13.5 (Ventura) or later and ships as a universal binary, so it runs natively whether you're on an M-series chip or an older Intel Mac, without any translation layer slowing it down. Apple Silicon Macs handle AI transcription and video encoding noticeably faster thanks to the on-chip media engine, though Intel machines stay fully supported for everyday recording and editing. If you're running the latest macOS release, version 8.7.3 specifically addresses capture glitches that appeared under Tahoe, so it's worth updating before you record anything important. Heavier tasks like long screen recordings or AI transcription of lengthy videos will feel snappier with 16GB of RAM or more, though the app itself runs comfortably on lighter configurations too.
How to Install Zight Screen Recorder on macOS?
Getting Zight running on your Mac takes just a few minutes.
- Click the download button on this page to get the latest Mac build.
- Open the downloaded installer file and follow the on-screen prompts.
- Launch Zight from your Applications folder or menu bar once installation finishes.
- Sign in with your existing account, or create a free one if you're new.
- Grant the screen recording and microphone permissions macOS asks for.
- Zight's icon will now sit in your menu bar, ready whenever you need it.
- You're set up and ready to capture your first screenshot or recording.
How to Use Zight Screen Recorder Mac?
- Once Zight is installed, the everyday workflow is short and repeatable.
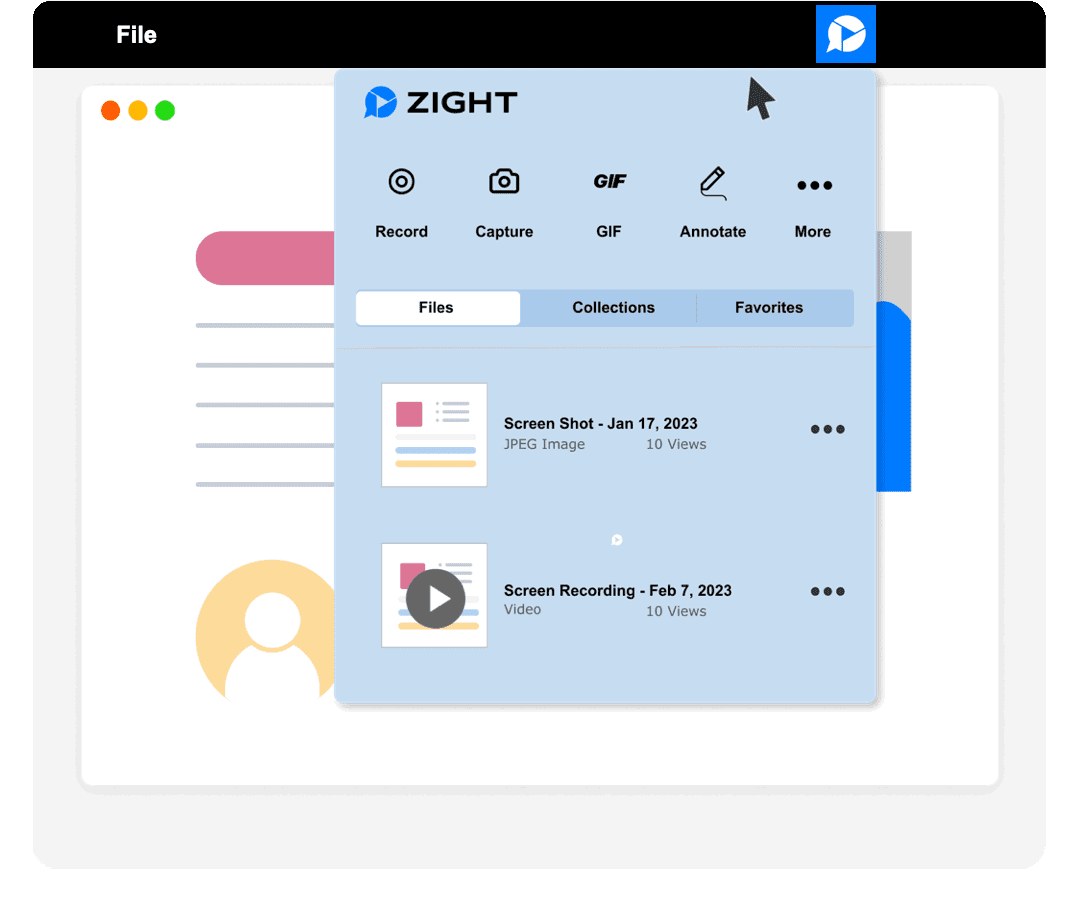
- Click the Zight icon in your menu bar to open the quick panel.
- Choose Record Screen, Screenshot, or Webcam depending on what you need.
- For a screenshot, click once for full screen or drag over a specific region.
- For a recording, pick your audio and camera preferences, then hit the red record button.
- Click Finish when done, and Zight uploads the file automatically.
- A shareable link lands on your clipboard instantly, ready to paste anywhere.
Final Verdict
Zight Screen Recorder for Mac works best for anyone who records often enough that a five-second setup and instant shareable link actually matter, from support teams to solo creators. It won't replace a full production suite for heavy video editing, but for screen capture, quick annotation, and fast sharing, it covers more ground than most native tools. Between the AI transcription, universal Apple Silicon support, and steady stream of Mac-specific fixes, it's a solid pick for daily screen recording on a Mac.
Download Zight Screen Recorder for Mac
Ready to start recording and sharing your screen in seconds? Grab the latest Mac build right here and get set up with a free account in minutes.